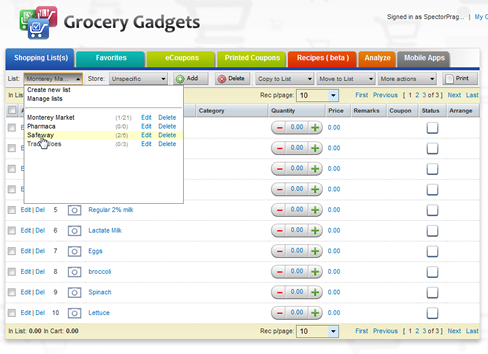
There are at least two approaches to organizing lists. Grocery Gadgets recommends you create lists for types of stores—grocery stores, drugstores, hardware stores, and so on. This way, the stores become subcategories of the lists. You can set up the program so that, if you need milk, it will appear on shopping lists for all of your grocery stores, but a store-brand cereal will only appear for the store that carries it.

But I prefer a simpler approach. I create a separate list for each store. I lose some functionality—the quantity of an item becomes specific to a store rather than to all stores where I might buy it—but the simplicity is worth that minor loss.
Step by Step
Until you get the hang of them, the phone versions of Grocery Gadgets can be a bit confusing. So I’m going to walk you through some basics. The Help web page can give you more details.
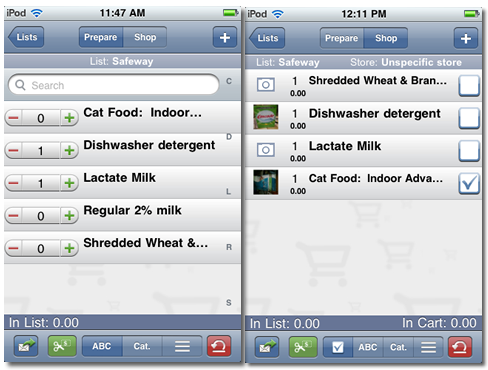
On the phone, each shopping list has two modes: Prepare and Shop. The Prepare mode (below, left) shows all items on that list, and allows you to set the quantity. The Shop mode (below, right) displays only the items where the quantity is greater than zero.

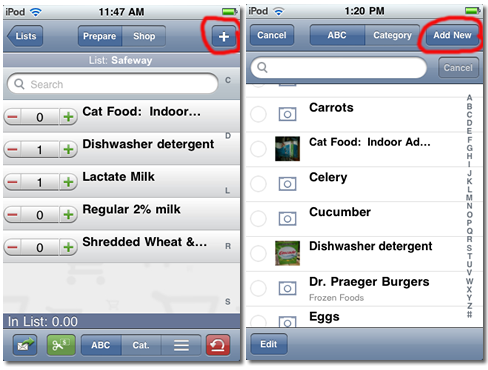
You add an item to the shopping list in Prepare mode. Press the + button in the upper-right corner to go to what the web version calls Favorites—a list of all items on all other lists. Select desired items by tapping the circle to the left of each desired item’s name. Then, if you have an iPhone, press the Add button in the upper-right corner; for Android, press the Insert button in the lower-left.

If the item you want to add isn’t on the Favorites list, press the Add New button in the upper-right corner (iPhone) or the Menu button, then Add Product (Android). (In case you haven’t already guessed, the button in the upper-right corner on the iPhone version changes with the context.) Up will come a dialog box for entering a new product.
article continues on next page…

