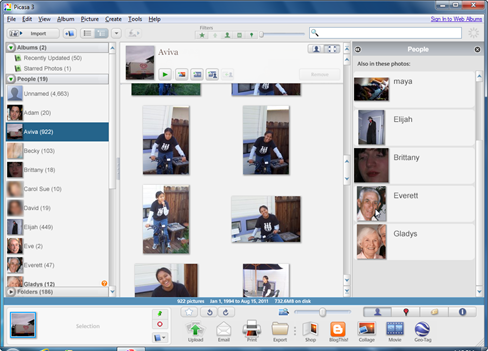
Once Picasa knows who is who, finding photos of a friend or relative is as easy as clicking on their face, or their name, in that same People section. Thumbnails of every photo they’re in will appear in Picasa’s middle pane.
You might get thumbnails of close-ups instead of thumbnails of entire photos. In that case, click the “View zoomed out…” icon in the upper-right corner of the viewing pane.

If you’d like to find pictures with two or more particular people in them, select one as described above. Then select View, then People from the menu at the top of the window. That will bring you a second list of people in the right pane. Click for anyone else you want in the picture.
Places
A digital photo can also carry a geotag that stores where the picture was taken. This allows you to select and examine photos from a particular location.
If you’re taking pictures with a GPS-equipped smartphone, those photos are probably already geotagged. Otherwise, you’ll have to do it yourself:
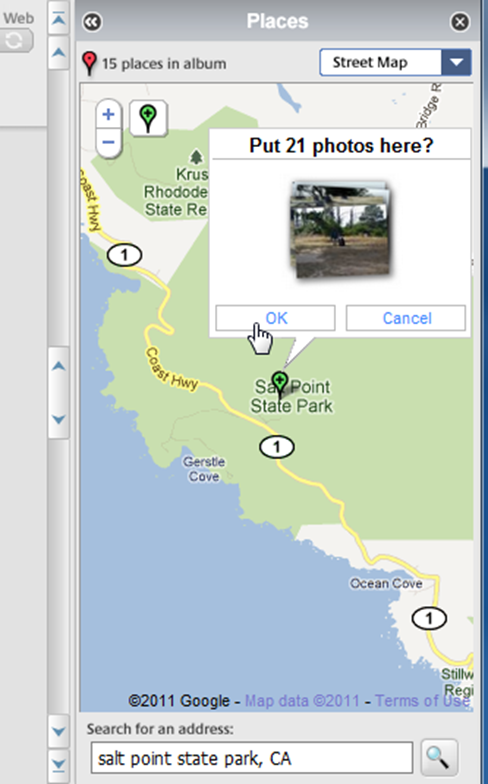
Select View, then Places from Picasa’s menu. This will bring up a Places view—sort of a mini version of Google Maps—in the right pane. Select one or more photos in the middle pane. Type an address in the “Search for an address” field at the bottom of the Places pane.
When you press ENTER, a pop-up balloon will ask for confirmation that this is where the photos were taken.

You can also click the green pin icon in the upper-left corner of the Places panel, then click a point on the map to put photos there.
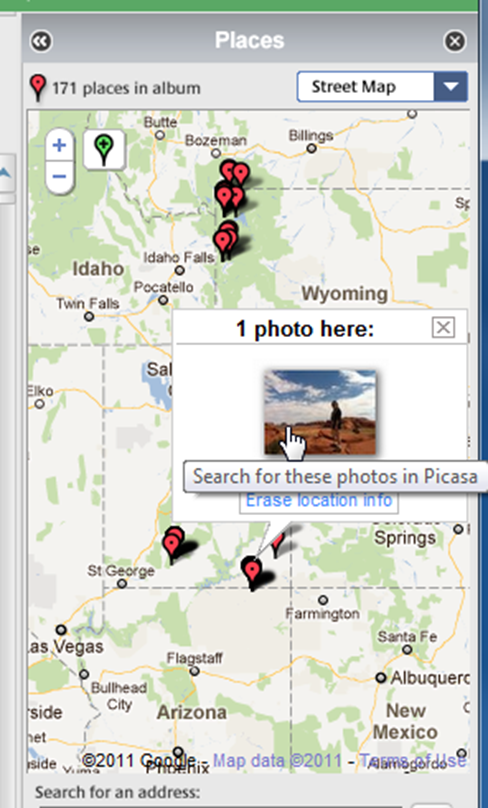
Geotagging a photo would be useless if you couldn’t search by location, but you can. As you look at the map, you’ll notice red pin icons all over it. Click one of these icons, then click the photo thumbnail in the pop-up window to view only the photos taken there.

Digital cameras, cellphones, and high-capacity storage have together resulted in huge photo collections. Some thoughtful organization will make these photos much easier to find.

